
Overview
This article describes the procedure for installing OpenWrt on a router appliance bare-bones PC and using it as a compact router.
This article is an OpenWrt remake of Building a Compact Router with VyOS: HUNSN RS34g.
Introduction
Two years ago I built a DIY router using VyOS, but various operational issues came up.
- VyOS could not correctly receive IPv6 prefixes via DHCPv6-PD from Nuro Biz (business-grade ISP)
- VyOS does not implement IPv6 ND Proxy
- Using VyOS for free means using the Rolling release (essentially alpha/beta quality), with no other option
- The LTS version is paid subscription only — the minimum is a 5-year commitment at $1,600/year (about ¥240,000 at ¥150/USD), which is out of reach for an individual and expensive even for a business. Comparable to buying a commercial router every year.
Unable to get the features I needed, and with essentially no cost advantage despite cheap hardware, I switched to OpenWrt around 2024. I kept putting off writing about it, so I’m finally documenting it properly.
Features of OpenWrt (as of October 2025)
- Originally started as a project to rewrite commercial router firmware on Linux
- Actively developed as open source from around 2004 to the present, supported by a broad community
- Free only — no paid edition exists
- Commercial routers based on OpenWrt also exist
- The Generic x86 version runs on standard PC hardware / virtual environments
- Highly customizable through a rich package ecosystem
- Designed with replacement of existing router firmware in mind — unfortunately there is no easy installer
- This article introduces a procedure to mitigate the installation hurdle
Hardware
October 2025 note: On Japanese Amazon, all HUNSN (深圳-based Hansung Technology) products are listed as “out of stock” and are no longer available. Instead, products with identical designs from a brand called AIOPCWA are recommended. HUNSN appears to still exist as a company, but AIOPCWA returns no useful search results.
If choosing now, search Amazon for “AIOPCWA Firewall” and look for Intel N100/N150 models priced around ¥30,000–40,000.
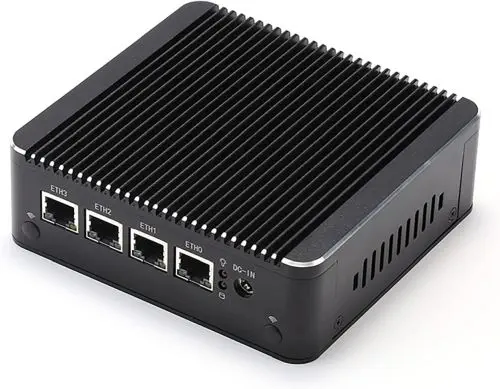
The following is from April 2023: Selected the HUNSN RS34g from router appliance products sold on Amazon. According to HUNSN’s official website, they are a Shenzhen-based manufacturer producing many embedded and industrial appliance products. Low power consumption, fanless, solid build quality, and performance that easily meets expectations.
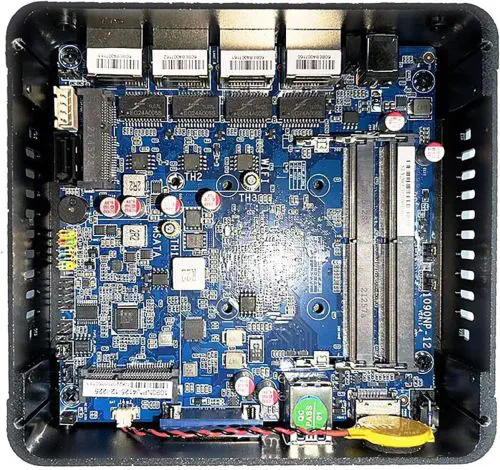
Hardware Specs and Configuration
| Front | Rear | Internal |
|---|---|---|

|
|
|
| Item | Configuration |
|---|---|
| Manufacturer/Model | HUNSN RS43g |
| Chassis | Aluminum, fanless |
| CPU | Intel® Celeron® Processor J4125, 4C4T, 4M cache, 2.70GHz |
| Storage | mSATA slot (added: Transcend mSATA SSD 64GB TS64GMSA230S) |
| Memory | SODIMM DDR4-2400 slot ×2 (added: CFD DDR4-2400 8GB×1 D4N2400PS-8G) |
| Expansion | mini PCIe slot Wi-Fi module capable |
| External I/O | USB3.0×2, HDMI, VGA, power button, reset hole |
| Wired LAN | 2.5GbE Intel I226-V b3 ×4 |
| Power | AC adapter 12V/3A |
| Power consumption | Max 10W |
| Size/Weight | 126 x 134 x 40.6mm / 1.2kg |
Setup Procedure
(1) Pre-work on the Work PC
Prepare a USB Live Linux for Installation
Follow the article MX Linux: A Lightweight Maintenance Linux Distribution That Boots from USB to create a USB Live Linux.
Prepare the OpenWrt Image
In a browser on the work PC, navigate to:
OpenWrt Stable Release > (latest version)/targets/x86/64/
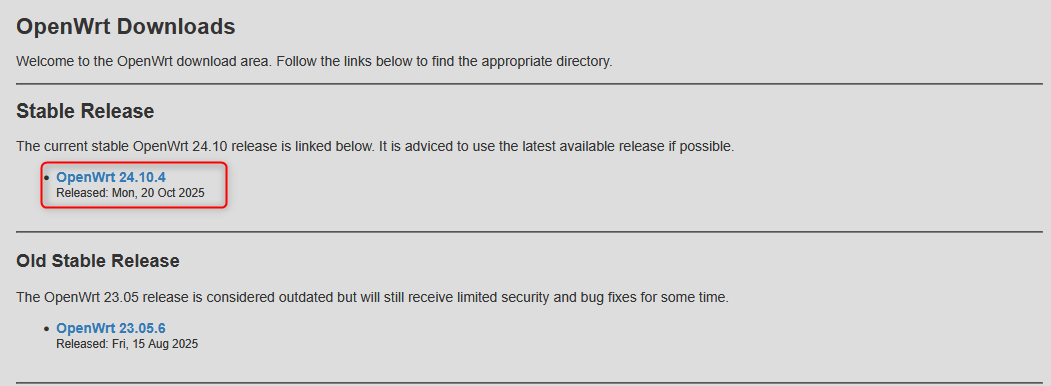
Download generic-ext4-combined-efi.img.gz.
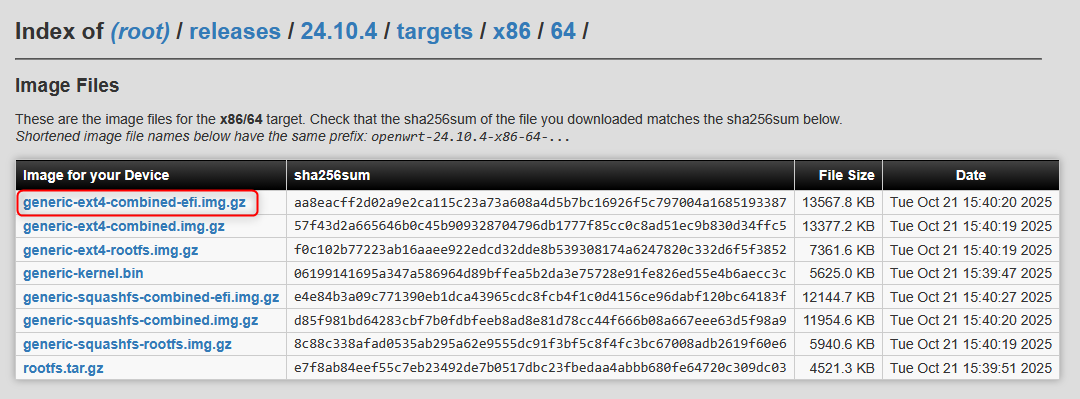
The actual filename will be something like openwrt-24.10.4-x86-64-generic-ext4-combined-efi.img.gz.
Following the File Exchange: Windows PC → MX Linux section of the article above, copy the downloaded image file to the top folder of the MX Linux USB drive.
(2) Basic Configuration on the Router PC
Write to the Router PC
- Insert the MX Linux USB into the router PC
- Boot the router PC and enter the BIOS menu
- Select the USB drive from the BIOS boot device selection and boot
- For HUNSN RS34g: BIOS menu [Save & Exit] tab > find the USB drive name under [Boot Override] and press [Enter], selecting the UEFI option
- Wait for MX Linux to boot
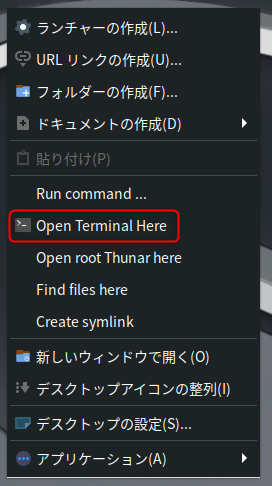
- Once logged in to MX Linux, right-click to open a terminal (Open Terminal Here)
sudo su -
[sudo] password for demo:

##  (Check internal SSD device name)
lsblk
NAME     MAJ:MIN RM  SIZE RO TYPE MOUNTPOINTS
loop0      7:0    0  2.3G  1 loop /live/linux
loop1      7:1    0    4G  0 loop /live/persist-root
sda        8:0    0 59.6G  0 disk
├─sda1     8:1    0   16M  0 part
├─sda2     8:2    0 59.6G  0 part
└─sda128 259:0    0  239K  0 part
sdb        8:16   1 28.9G  0 disk
└─sdb1     8:17   1 28.9G  0 part /home/demo/Live-usb-storage
                                  /root/Live-usb-storage
                                  /live/boot-dev
↑ Determine that /dev/sda is the internal SSD and /dev/sdb is the MX Linux USB
##  (Move to the top folder of the MX Linux USB)
cd /live/boot-dev/

## (Confirm the image file is there)
ls *.img.gz

## (Write the image to the internal SSD)
zcat openwrt-24.10.4-x86-64-generic-ext4-combined-efi.img.gz > /dev/sda

## (Completes in a few seconds)
exit
Shut down MX Linux on the router PC and remove the MX Linux USB drive.
Boot OpenWrt on the Router PC
Power on the router PC. If the OpenWrt image was written successfully, it should boot from the internal SSD.
- Confirm BIOS → Grub → OpenWrt boot sequence on the monitor
- When the display stops, press [Enter] to log in
BusyBox v1.36.1 (2025-10-19 16:37:45 UTC) built-in shell (ash)

  _______                     ________        __
 |       |.-----.-----.-----.|  |  |  |.----.|  |_
 |   -   ||  _  |  -__|     ||  |  |  ||   _||   _|
 |_______||   __|_____|__|__||________||__|  |____|
          |__| W I R E L E S S   F R E E D O M
 -----------------------------------------------------
 OpenWrt 24.10.4, r28959-29397011cc
 -----------------------------------------------------
=== WARNING! =====================================
There is no root password defined on this device!
Use the "passwd" command to set up a new password
in order to prevent unauthorized SSH logins.
--------------------------------------------------
- Set the OpenWrt root password
root@OpenWrt:~# passwd
Changing password for root
New password:
Retype password:
passwd: password for root changed by root
- Use
ifconfigto confirm that “br-lan” has 192.168.1.1 (Mask 255.255.255.0) assigned.
root@OpenWrt:~# ifconfig
br-lan    Link encap:Ethernet  HWaddr 60:BE:B4:09:CA:AB
          inet addr:192.168.1.1  Bcast:192.168.1.255  Mask:255.255.255.0
          inet6 addr: fe80::62be:b4ff:fe09:caab/64 Scope:Link
          inet6 addr: fde1:7c9a:bbd7::1/60 Scope:Global
          UP BROADCAST RUNNING MULTICAST  MTU:1500  Metric:1
          RX packets:14199 errors:0 dropped:1294 overruns:0 frame:0
          TX packets:1313 errors:0 dropped:0 overruns:0 carrier:0
          collisions:0 txqueuelen:1000
          RX bytes:3520810 (3.3 MiB)  TX bytes:165257 (161.3 KiB)

eth0      Link encap:Ethernet  HWaddr 60:BE:B4:09:CA:AB
          UP BROADCAST RUNNING MULTICAST  MTU:1500  Metric:1
          RX packets:14433 errors:0 dropped:178 overruns:0 frame:0
          TX packets:1316 errors:0 dropped:0 overruns:0 carrier:0
          collisions:0 txqueuelen:1000
          RX bytes:3766844 (3.5 MiB)  TX bytes:165523 (161.6 KiB)
          Memory:a1600000-a16fffff

eth1      Link encap:Ethernet  HWaddr 60:BE:B4:09:CA:AC
          inet6 addr: fe80::62be:b4ff:fe09:caac/64 Scope:Link
          UP BROADCAST MULTICAST  MTU:1500  Metric:1
          RX packets:0 errors:0 dropped:0 overruns:0 frame:0
          TX packets:0 errors:0 dropped:0 overruns:0 carrier:0
          collisions:0 txqueuelen:1000
          RX bytes:0 (0 KiB)  TX bytes:0 (0 KiB)
          Memory:a1400000-a14fffff

lo        Link encap:Local Loopback
          inet addr:127.0.0.1  Mask:255.0.0.0
          inet6 addr: ::1/128 Scope:Host
          UP LOOPBACK RUNNING  MTU:65536  Metric:1
          RX packets:737 errors:0 dropped:0 overruns:0 frame:0
          TX packets:737 errors:0 dropped:0 overruns:0 carrier:0
          collisions:0 txqueuelen:1000
          RX bytes:58665 (57.2 KiB)  TX bytes:58665 (57.2 KiB)
- For a 4-port PC like the HUNSN RS34g, the default state is:
| Physical Port | OpenWrt I/F | State |
|---|---|---|
| ETH0 | eth0 | Assigned to br-lan bridge |
| ETH1 | eth1 | WAN (DHCP client) |
| ETH2 | eth2 | (unassigned) |
| ETH3 | eth3 | (unassigned) |
| — | br-lan | LAN (DHCP server) |
- Connect your home/office LAN to ETH1 and confirm DHCP provides an address
- Use
ifconfigto verify an address is assigned to eth1 - If your existing LAN uses the 192.168.1.x segment, there may be a conflict and things may not work properly
- ※ Be absolutely careful: connecting ETH0 to your home/office LAN will cause a DHCP server conflict
- Use
Changing the OpenWrt LAN Address in Advance
If the existing network you’re connecting to OpenWrt’s WAN side overlaps with 192.168.1.0/24, the subsequent steps will fail. To change OpenWrt’s LAN address beforehand, enter the following commands using the directly connected keyboard.
# Set the desired OpenWrt LAN IP (example)
uci set network.lan.ipaddr='192.0.2.1'
uci set network.lan.netmask='255.255.255.0'
uci commit
service network restart
(3) Remote Configuration via SSH from Work PC
Connect the Work PC to the Router PC
- Connect the work PC’s LAN port to the router PC’s LAN side (ETH0) with a LAN cable
- Using a second LAN port added via USB-LAN adapter is convenient
- Keep the router PC’s WAN side (ETH1) connected to your home/office LAN
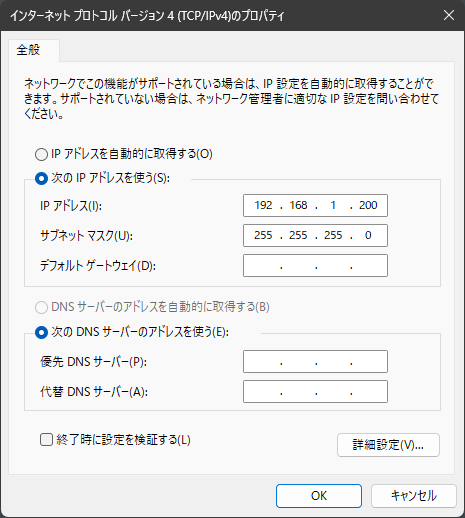
- Change the IPv4 address on the work PC’s port connected to the router PC
- IPv4 address: 192.168.1.200/255.255.255.0
- If you changed the LAN IP in the previous step, use 192.0.2.200/255.255.255.0 etc. and adjust accordingly
- Default gateway/DNS: leave blank
- IPv4 address: 192.168.1.200/255.255.255.0
- Try pinging 192.168.1.1 (or your modified OpenWrt LAN IP) from PowerShell to check for a response
PS C:\> ping 192.168.1.1

Pinging 192.168.1.1 with 32 bytes of data:
Reply from 192.168.1.1: bytes=32 time<1ms TTL=64
Reply from 192.168.1.1: bytes=32 time<1ms TTL=64
Reply from 192.168.1.1: bytes=32 time<1ms TTL=64
Reply from 192.168.1.1: bytes=32 time<1ms TTL=64

Ping statistics for 192.168.1.1:
    Packets: Sent = 4, Received = 4, Lost = 0 (0% loss),
Approximate round trip times in milli-seconds:
    Minimum = 0ms, Maximum = 0ms, Average = 0ms
SSH from Work PC to Router PC
From here, use Windows’ built-in SSH client or an app like RLogin to SSH into the router PC and work remotely.
- SSH destination: 192.168.1.1
- User: root
- Password: (the one set earlier)
BusyBox v1.36.1 (2025-10-19 16:37:45 UTC) built-in shell (ash)

  _______                     ________        __
 |       |.-----.-----.-----.|  |  |  |.----.|  |_
 |   -   ||  _  |  -__|     ||  |  |  ||   _||   _|
 |_______||   __|_____|__|__||________||__|  |____|
          |__| W I R E L E S S   F R E E D O M
 -----------------------------------------------------
 OpenWrt 24.10.4, r28959-29397011cc
 -----------------------------------------------------
root@OpenWrt:~#
Verify OpenWrt Internet Connectivity
OK if ETH1 obtains an IP via DHCP and can resolve OpenWrt’s domain name.
root@OpenWrt:~# nslookup www.openwrt.org
Server:         127.0.0.1
Address:        127.0.0.1:53

Non-authoritative answer:
www.openwrt.org canonical name = wiki-03.infra.openwrt.org
Name:   wiki-03.infra.openwrt.org
Address: 64.226.122.113

Non-authoritative answer:
www.openwrt.org canonical name = wiki-03.infra.openwrt.org
Name:   wiki-03.infra.openwrt.org
Address: 2a03:b0c0:3:d0::1a51:c001
※ OpenWrt runs dnsmasq as a DNS cache by default, so Server address is always 127.0.0.1 (localhost)
Partition Expansion
- After booting from a written image, OpenWrt’s
/filesystem is only about 100MB by default - Expand the partition size to use the full SSD capacity
Check storage (before expansion)
root@OpenWrt:~# df -h
Filesystem                Size      Used Available Use% Mounted on
/dev/root                98.3M     25.5M     70.7M  27% /   # ← root has little free space
tmpfs                     3.8G    260.0K      3.8G   0% /tmp
/dev/sda1                16.0M      6.3M      9.7M  39% /boot
/dev/sda1                16.0M      6.3M      9.7M  39% /boot
tmpfs                   512.0K         0    512.0K   0% /dev
Install packages
opkg update
opkg install parted losetup resize2fs
Download and run the partition expansion script, then reboot
cd /tmp
wget -U "" -O expand-root.sh "https://openwrt.org/_export/code/docs/guide-user/advanced/expand_root?codeblock=0"
. ./expand-root.sh
reboot
SSH disconnects at reboot. The system reboots about 3 times. After completion, SSH back in and verify capacity.
root@OpenWrt:~# df -h
Filesystem                Size      Used Available Use% Mounted on
/dev/root                58.8G     27.1M     58.8G   0% /  # ← root has more free space
tmpfs                     3.8G    232.0K      3.8G   0% /tmp
/dev/sda1                16.0M      6.3M      9.7M  39% /boot
/dev/sda1                16.0M      6.3M      9.7M  39% /boot
tmpfs                   512.0K         0    512.0K   0% /dev
Additional Package Installation
- Add missing packages from the default OpenWrt image
- Update all packages
# Fetch package list
opkg update
# CPU features
opkg install acpid irqbalance luci-app-irqbalance intel-microcode
# Intel Graphics driver
opkg install i915-firmware
# Maintenance tools
opkg install htop less diffutils vim-full procps-ng-ps procps-ng-w pciutils ethtool lsblk
# Monitoring
opkg install lm-sensors collectd-mod-sensors collectd-mod-thermal collectd-mod-irq lldpd luci-app-lldpd owut luci-app-attendedsysupgrade luci-app-statistics snmpd luci-app-snmpd fstrim openssh-sftp-server avahi-utils
# Wireguard VPN
opkg install wireguard-tools luci-proto-wireguard
# Japanese localization (remove if not needed)
opkg install luci-i18n-base-ja luci-i18n-attendedsysupgrade-ja luci-i18n-firewall-ja luci-i18n-package-manager-ja luci-i18n-statistics-ja luci-i18n-irqbalance-ja

# vim config
touch ~/.vimrc

# Upgrade all packages
opkg list-upgradable | cut -f 1 -d ' ' | xargs -r opkg upgrade

# Reboot
reboot
Network Configuration
Applying the following policy:
- Physical port reassignment
| Physical Port | OpenWrt I/F | State |
|---|---|---|
| ETH0 | eth0 | Assigned to br-lan bridge |
| ETH1 | eth1 | Assigned to br-lan bridge ★ |
| ETH2 | eth2 | Assigned to br-lan bridge ★ |
| ETH3 | eth3 | WAN (DHCP client) ★ |
| — | br-lan | LAN (+DHCP server) |
- Change NTP server to NICT
- Other Ethernet tuning
Using UCI (Unified Configuration Interface), OpenWrt’s configuration command system. Web UI is also possible but would require extremely many steps, so this article uses CLI-based instructions.
# LAN
uci set network.lan.defaultroute='0'
uci set network.lan.delegate='0'
uci delete network.@device[0].ports
uci add_list network.@device[0].ports='eth0'
uci add_list network.@device[0].ports='eth1'
uci add_list network.@device[0].ports='eth2'
uci set network.lan.proto='static'
uci set network.lan.device='br-lan'
uci set network.lan.ip6assign='64'
# WAN
uci set network.wan.device='eth3'
uci set network.wan.delegate='0'
# WAN6
uci set network.wan6.device='eth3'
uci set network.wan6.proto='dhcpv6'
uci set network.wan6.reqaddress='try'
uci set network.wan6.reqprefix='auto'

# tuning
uci set firewall.@defaults[0].flow_offloading='1'
uci set firewall.@defaults[0].flow_offloading_hw='0'
uci set network.globals.packet_steering='1'
uci set irqbalance.irqbalance.enabled='1'

# Hostname, timezone, and other settings
uci set system.@system[0].hostname='homerouter0'
uci set system.@system[0].timezone='JST-9'
uci set system.@system[0].zonename='Asia/Tokyo'

# NTP server and distribution settings
uci set system.ntp=timeserver
uci set system.ntp.enable_server='1'
uci set system.ntp.use_dhcp='0'
uci set system.ntp.interface='lan'
uci delete system.ntp.server
uci add_list system.ntp.server='ntp.nict.jp'

uci commit

# Expand NAT tracking table for environments with many clients
# Default 4096 → 20000
# ※ Adjust based on CPU capacity
cat <<'__EOT__' >> /etc/sysctl.conf
net.netfilter.nf_conntrack_expect_max=20000
__EOT__

# Increase NIC ring buffer to prevent packet drops: 256 → 512
# ※ Adjust based on environment
cat <<'__EOT__' > /etc/rc.local
# Put your custom commands here that should be executed once
# the system init finished. By default this file does nothing.
ethtool -G eth0 rx 512 tx 512
ethtool -G eth1 rx 512 tx 512
ethtool -G eth2 rx 512 tx 512
ethtool -G eth3 rx 512 tx 512
exit 0
__EOT__

# Reboot when done
reboot
Recabling the Router PC
In this example the WAN port has changed, so during the reboot swap the LAN cable from ETH1 → ETH3.
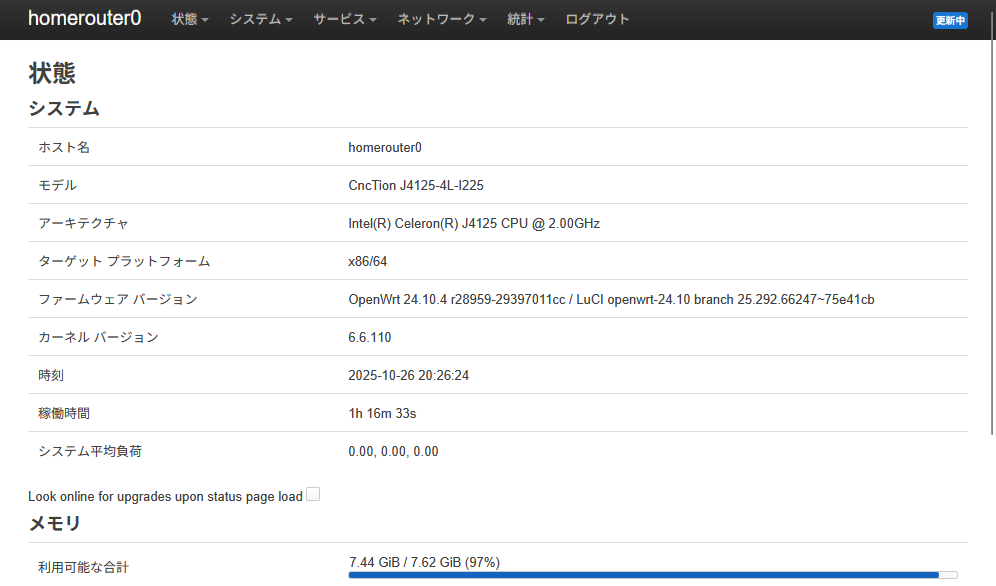
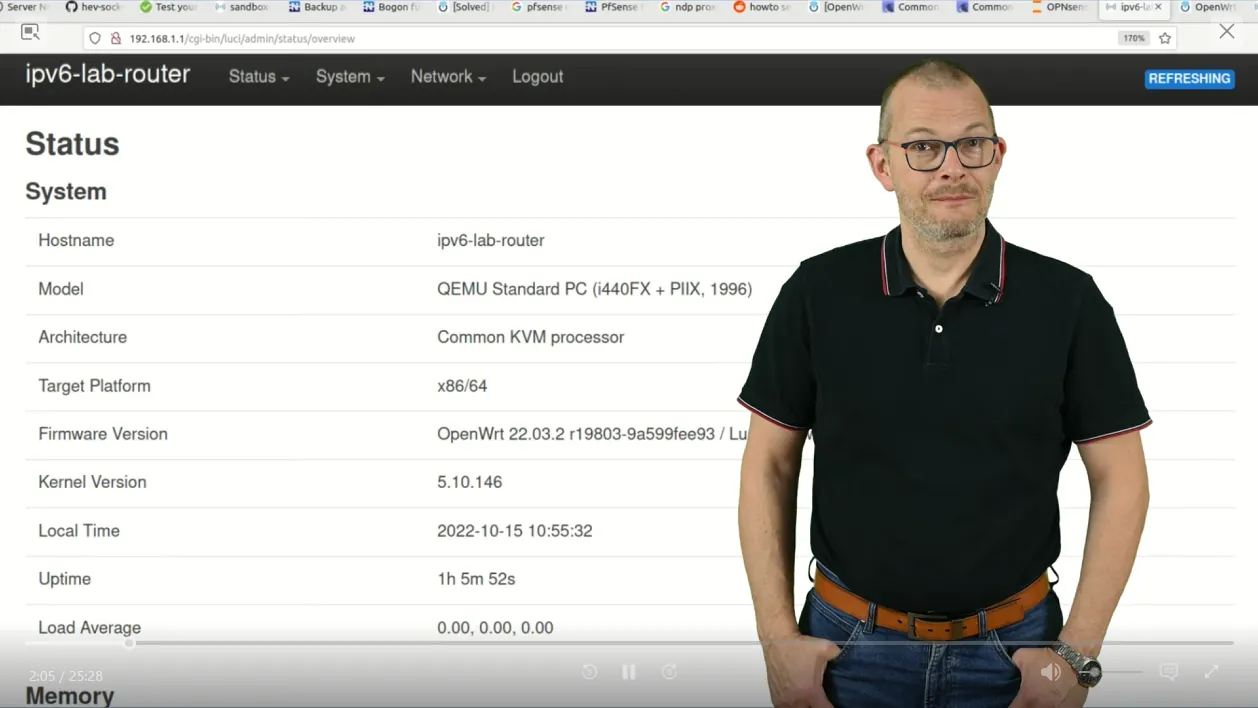
(4) OpenWrt Settings from Work PC Browser
Open the URL below if using default values; adjust if the LAN address was changed.
http://192.168.1.1/
Enter the root password set earlier.

Confirm the overview screen appears.
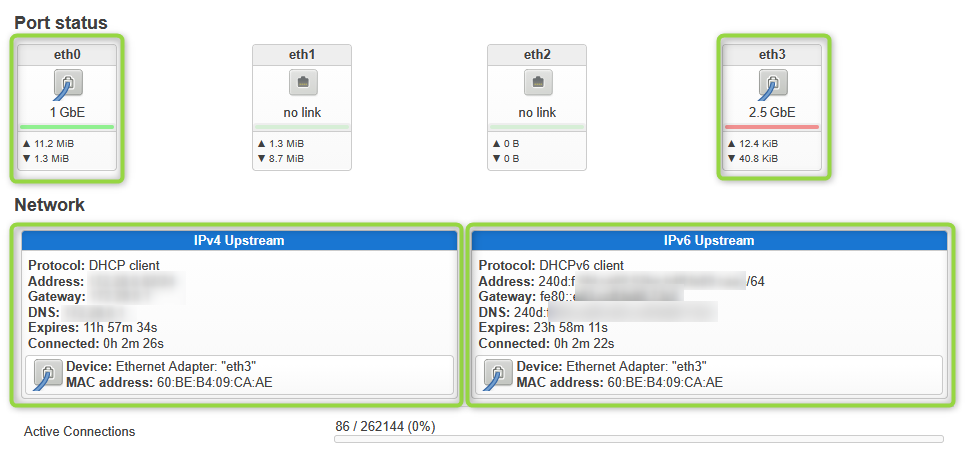
Scroll down to verify that physical ports eth0/eth3 are link-up and that the WAN side has obtained IPv4 DHCP / IPv6 SLAAC addresses from your home/office network. In the example screenshot, the home IPv6 Upstream is also automatically configured.
Follow-up Steps
With this, the basic setup is complete. Customize for your environment by referring to the various documentation.
References
- OpenWrt Project
- Official website
- OpenWrt Tutorial Video Playlist (YouTube)
- OpenWrt tutorial videos by “OneMarcFifty”. Recommended with subtitles + auto-translated to your language.
- How to configure OpenWrt as Firewall for your home network and Guest Wifi and IPTables explained
- Tutorial on configuring basic OpenWrt router firewall settings via Web UI (LuCI)
- IPv6 with OpenWrt (YouTube)
- Deep-dive on DHCPv6-PD used by business ISPs and IPv6 ND Proxy for home IPv6.
- Deep-dive on DHCPv6-PD used by business ISPs and IPv6 ND Proxy for home IPv6.